Installing the Shiplap
The Living Room was the primary focus of our renovation. We decided on using Tongue and Groove shiplap for the walls instead of standard drywall. Installation is easier, as they just lock into each other, doesn't require taping/texturing and/or painting, and it adds a bunch of character. While the upfront cost is higher per square foot than drywall, the labor involved is much less. Prior to installation of the shiplap the walls were insulated and covered with 6-millimeter plastic sheeting. This provided an additional layer of enveloping that goes beyond the paper vapor barrier of the insulation. Note the plastic sheeting covers the walls, ceiling and between the subfloor and joists.
The profile of the shiplap is to the left, however it is #106 instead of #105. The difference is that #106 is tongue and groove instead of the drop-lap shown.
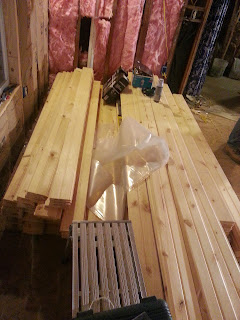
After delivery the boards were brought in and left to acclimate for approximately 4 days before installation. This allows for the moisture in the wood to achieve parity with the humidity levels in the room.
Installation was a breeze as the floors were level. A spot check during each course to ensure the boards are level and straight is needed. Spot checks will identify any unwanted curvature in the boards, and allows for corrections. There will be waste when cutting boards to the proper length to make edge contact with the wall studs. A 2" pneumatic finish (16g) nailer makes for fast hanging of boards.
I attempted to make the boards line up as randomly as possible, consuming as many waste pieces as possible as well. This was a bit of a balancing act, especially between the windows on the left. The span was a little shy of 8 feet, so I was able to use whole boards at times, breaking up the separation of the boards.
A table saw was used to rip the final boards to fit at the ceiling and the utility chase.
A miter saw was used to cut the length as the boards required a straight, square cut.
 The knotty pine was smooth and included some heartwood, giving a very nice finish.

The installation in the room took about 4 days, with 2 people installing the boards and one person making the cuts. We had an air compressor that was able to support 2 nailers, and it made for some very quick installation. A single person can install the boards, and while it would take some more time, it is far easier to install than traditional drywall.


Comments
Post a Comment